How to Switch to a New Microsoft Dynamics VAR
Adding, Removing, or Switching Microsoft Dynamics VAR Partners
After you’ve vetted and committed to a new Microsoft Dynamics VAR partner, it’s time to make it official. Managing the partners associated with your account is easy — whether you’re starting from scratch or updating an existing account.
Across the board, partner relationships are managed through the Microsoft 365 administrator center – but individual steps vary based on where you’re at in the Dynamics journey.
Adding a Partner at the Point of Purchase (New Customers)
If you’re just signing up for Dynamics 365 and already have a partner, you can add them to your account during the initial transaction.
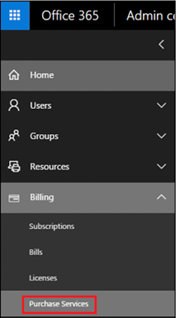
- Head over to the Microsoft 365 admin center and sign into your account with your Microsoft 365 Global admin credentials.
- From the left sidebar under Billing, select Purchase Services.
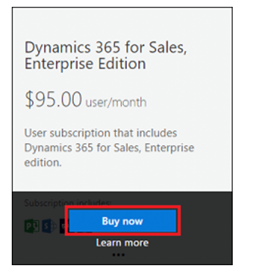
- Find Dynamics 365 — either by search or scroll – and choose a subscription.
- Click Buy Now to confirm your choice.
- Next, you’ll be asked to enter the number of users you’ll be adding to the account – and, if you have one – a promo code.
- Then select Find a Solution Provider from the top menu and follow the prompts. As you can see in the screenshot below, this is totally optional. You can add a partner at any time.
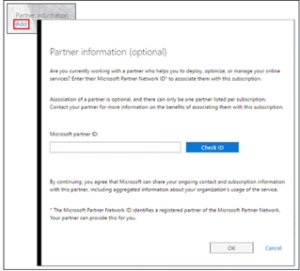
- Once you’ve selected a partner, you’ll return to the checkout page to complete the purchase.Adding a VAR Partner to an Existing Account
Adding a VAR Partner to an Existing Account
If you signed up for a subscription before choosing a partner, you can add one from the admin center when you’re ready.
1. Again, you’ll log in as a “Global Administrator.”
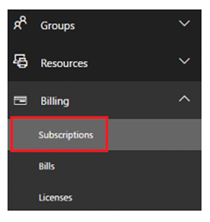
2. Then this time, you’ll navigate to Billing, Your Products, then select Dynamics 365 from your list of subscriptions.
3. From the Subscription page, you’ll then navigate to the Partner tab.
4. Enter the Partner Network ID and click Add.
Adding a Partner via Invite
It’s important to understand that accepting a partner invitation means you’ve agreed to grant them the permissions associated with their selected “type.” When you authorize the request, permissions and admin roles are automatically updated in your Azure AD settings.
As mentioned above, partners can invite you to “establish a relationship” via email.
To add them to your subscription:
Open the email and follow the link to the Microsoft 365 admin center.
Go to the Accept Agreement & Authorize Partner page, then click Microsoft Customer Agreement.
Read the agreement and check the box to confirm you’ve gone over the fine print.
Then, click Accept & Authorize.
If you receive an invite and you’re not ready to that partner access, cancel the invitation.
It’s better to hold off until you’ve defined the terms of your arrangement than to prematurely accept and roll back permissions after the fact.
If You’re Switching Microsoft Dynamics VAR Partners
- Navigate to Billing, then Products, then Subscriptions (yes, in the admin center).
- Click Partner Information and choose Remove from the menu.
- Then from there, enter the new partner’s Microsoft Network ID and click Add.
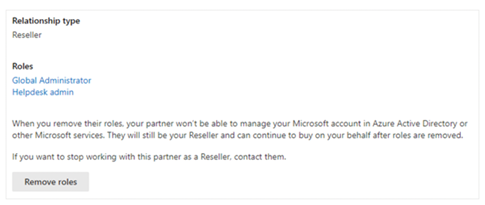
If You’d Like to Edit or Remove Partner Admin Roles
- Go to your admin center Settings, then navigate to the Partner Relationships page.
- Click on the partner record you’d like to update and select Remove Roles.
- Check Yes in the pop-up dialog box to confirm the change.
Keep in mind that removing roles doesn’t end the relationship. You do have the option to work with them in a different capacity.
For example, you might opt to make a Delegated administrator a Partner or Advisor.
Or, if you have a partner you’re no longer working with on a regular basis, it might make more sense to make them a Reseller, so that you can still buy products from them – or re-engage them if their services are needed in the future.